New Fascination: Zero Waste

I saw a video on Facebook the other week from the blog “Trash is for Tossers” about fitting 5 years of trash into ONE TINY JAR. Like. I throw more than a jar’s worth of trash away in a day. My question is… HOW? The answer is simple and not simple. You have to change your lifestyle to be able to go “Zero Waste”.

What is Zero Waste? Well, friends, it’s when the life you lead doesn’t produce garbage or trash that will end up in a landfill. But Roxanne, (you’re saying to yourself), how will I buy anything ever? There’s trash connected to everything we buy. Food comes in packages, tags are attached to clothes, and electronics come wrapped in plastic, heck when someone gives you a present it’s wrapped in bows and paper.

The first step: Assess your life and think about what it is you are throwing away, and how to limit that. Are you getting food in wrappers that are thrown away on a regular basis, like chips, protein bars, and juice bottles? Well, make those granola bars instead of buying the box of individually wrapped ones. Buy and use fabric produce bags to prevent taking a plastic bag every time you need a few apples. It’s all about being conscious of what you are doing on a day to day basis and choosing different products.

It’s all about making better choices. Making smarter, healthier, and more earth-friendly choices.

The 5 R’s of Zero waste: 

Refuse: Just say NO! No to plastic bottles of water, wrapped candies, straws in your drink, plastic bags at the store. Say no to plastic cups of beer at parties. Yeah bringing your own jar for a drink might look a little weird, but you aren’t making trash so let them look at you funny.

Reduce: You can cut back on the trash that you accumulate by making some simple purchases, like the items in the photo below. You can get your produce from the farmer’s market and reduce the amount of packaging you throw away. Shopping in the bulk area of the grocery store, getting local soaps, meats, and other package free products are a great way to start.

Recycle: This is an easy one to understand. Get things in recyclable packages, and recycle. Make an effort to not throw your recyclables in the trash. Also, buy things that are compostable, biodegradable, or eco-friendly. Buying local products didn’t come from a large plant and use fuel emissions to get shipped to you is another smart choice.

Reuse: Looks like you’re gonna have to spend money to save money. Get yourself some “Zero Waste” gear. Get reusable produce bags, grocery bags, jars for bulk food, reusable water bottles. ALSO start getting cozy with your local thrift store because this will be the best way to find awesome gently used clothes, furniture, and other household items.

Rot the Rest: Start a compost bin! There are a ton of ideas on the web for composting in small spaces, in your yard, and how to get started. Keep your food scraps and make them into the dirt to grow some herbs and veggies if you have a small apartment patio, or make a larger compost pile if you have an actual backyard.

Follow the Litterless blog and check out this post on how to get started. Litterless also makes a great point here about why to go zero waste: “I think it’s really critical for several reasons. First of all, trash doesn’t decompose in landfills – instead, it sits there more or less unchanged forever, belching out greenhouse gases like methane.”

Follow my “Off the Grid” Pinterest Board for Zero Waste ideas!

Remember, you CAN make a difference. One person at a time!

Craft Fair Trial and Errors

So life lately has been a little crazy… I quit my second job to become a crafter FULL TIME. It’s scary, but it’s my passion, and I LOVE it. I recently did a craft fair in Lake Geneva, Wisconsin and got some great advice from a fellow crafter. “Do not give up!” She saw it was my first time at this fair and I was struggling with the wind from the lake affect almost blowing my tent to the next county and she had some kind words for me. I love the crafting community, they (so far) are very kind, welcoming, and helpful people. They watch your tent when you have to use the bathroom, they chat with you during the fair, and help save parking spaces for you afterwards.

lake geneva

The view from my tent in Lake Geneva was very gorgeous! It was also soothing to hear the water all day. The sun was shining, and the boats were buzzing. The wind was blowing… On day 2 the wind was so bad we were holding the legs of the tent with our full body weight to keep it from bending and breaking. Stuff was blowing off the tables left and right. Other crafters were giving us advice, like taking the sides off the tent to let the air through, and lowering the tent a few notches to strengthen the legs which actually helped a lot. We even tied weights to the top of the tent and let them hang to the ground, and some crafters had long ratchet ties from the tops of their tents at an angle into the ground with spiral dog leash steaks and that seemed to help them too.

tent in lake geneva

We had bags displayed on peg board and the wind wanted to take that thing home! The weight of the pegboard was doing damage to the tent, since we hung it from the top. Some other crafters had metal racks that were free standing, and the air flowed through them much more freely. I’ll be ordering those soon!

lake geneva 3

There were a LOT of great crafters to check out. I saw so many dogs, and it was great for people watching.

lake geneva 2

There were gorgeous buildings along the coastline, and a paddle boat giving tours all day.

After much trial and error, I’ve compiled a list of the things I bring to the fairs. Here’s a PDF of my checklist for the craft fairs. —> Craft Fair Check List Sheet

I know my list is specific to what I do at the fairs, but it may help some people! I compiled it from a bunch of other lists I’ve seen. Washing your hands with your drinking water at your tent after eating an apple and letting your hands air dry -vs- wet wipes… no brainer.

Some other advice we got from other crafters- Don’t be afraid to think outside the box. Don’t be afraid to sell wholesale. Make connections and talk to the people around you, always. Build those relationships, you’ll be seeing a lot of the same people around!

I hope this helps some of you!

My New Job: Craft Fair Circuit

So a little over a month ago I quit my full time job as a corporate Interior Designer to work Craft Fairs selling my bags and other hand made goods that I make out of re-purposed materials. I have to say, this is the best decision I have ever made. I am happier, less stressed out, less anxious, and for the first time in a long time, I feel like I’m finally doing something I want to do, and while I work, I don’t feel like there’s somewhere else I need to be. I love being able to create the things I want to create and see them come to fruition. (Finally!)

tent at bailey

Each fair is a new experience, from the layout of the tent, to the location, to the craft neighbors we land next to. One week it was a mother daughter team selling tutus, and one week it was a character artist. We were also lucky enough to land next to someone that watched my cashbox while I used the bathroom since I was working alone that weekend.

tent at bailey's 2

I have noticed that different things are popular at different markets. One week it’s the whales, one week it’s the keychains. Every group is different!

Display

Coming up with a display is the most fun part. I always love a challenge.

booth

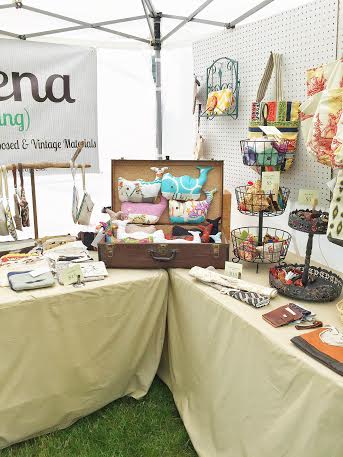
I love to incorporate vintage pieces into my display too, from luggage, to gold luggage carts, to found branches to hang bags off of.

collage

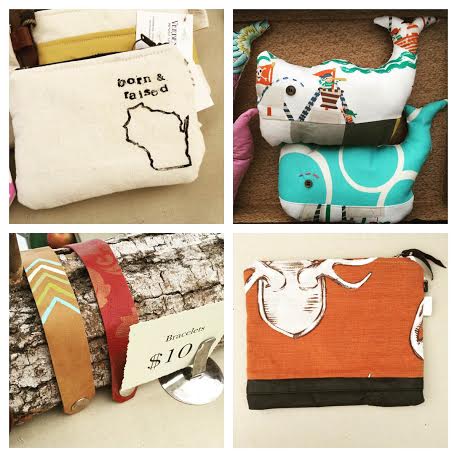
I like to keep a variety of things for sale, to let people know I have something for everyone!

fabric pile

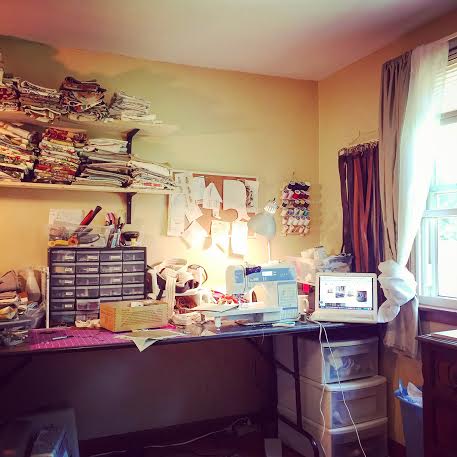
My craft room at home is a disaster, but that’s ok with me. It gives me a chance to clean it, and re-find things I forgot I had.

I’ll do a post on useful tips and tricks for getting into craft fairs as well, and what to bring as well as a check sheet. Stay tuned!

All Aboard the Entrepreneur-ship!

I have been thinking a LOT lately about working for myself, being my own boss. I was thinking that was the only way I would be truly happy. I want to be creative, but not get taken advantage of for my ideas and designs. I wanted to make my own schedule, and go where I need when I wanted to. I want to see sunshine and not be in a stuffy office all day. I want a day off sometimes and for it not to ruin my paycheck. So, I started to take my side business and hobby for sewing more seriously. I am going to sew and create bags out of re-purposed materials and join the craft fair circuit. It meets all of the criteria of the perfect job I was looking for! So with the inspiration of this cartoon by Bill Watterson (creator of Calvin and Hobbes,) I was motivated to follow happiness, and to quit my day job.

Verbena 1

My new office is my spare bedroom, which has been a craft room since we moved in, but now is my full time place of creative employment.

Verbena 3

I’ve read SO MANY of the Etsy articles on crafters that quit their day job, and it has inspired me. They all talk about how hard it can be financially, but I am confident that with the craft fairs, Etsy sales, and friends buying my stuff, it will work out.

Verbena 2

I can watch movies, listen to jazz, and talk to my fiancée, who is also working from home, in the back yard, as a gardener / farmer.

Verbena 4

I love to scour the thrift stores and antique stores for materials to use in my bag making, like aprons, belts, zippers, and rolls of fabric. A LOT will go to the craft fairs, but check my Etsy for new things.

Happy Dream Following!

DIY Outdoor Pillows

With all of the free fabric samples I get from Interior Design studios, and things I pick up at Goodwill, and at garage sales, I’ve got a surplus of crafting supplies. I decided to take some indoor/outdoor fabric and some pillows I got free from a church and make some great outdoor pillows for my new outdoor chair.

DIY Pillows 3

The free pillows I wanted to use for my new pillows.

I used THIS awesome tutorial to make the pillows. I won’t bother replicating it since it’s such a great tutorial with pictures and everything. I didn’t use any of the glue stick though like she mentions for the zipper. I just started to sew.

The pillows measure 17″ x 17″ and I had some colorful invisible zippers I ordered on accident and wanted to use them up. They were only about 9″ so the whole pillow didn’t fit into the hole. I had to cut apart the pillows and take out the stuffing. Hence the lumpy pillows. But I don’t care!

The samples also have grommets in them like almost in the middle. That’s what fabric companies do when they send large samples to design studios so they can’t use them. Guess what? I used them! I avoided the grommets by 1″ and used grommet free pieces. I used 4 different pieces that were all in the same color family.

My new pillows!

DIY Pillows 2

And… My new hanging chair!

DIY Pillows 1

This chair was at Fleet Farm, or Farm and Fleet (wherever you live, it’s different) for only $40! And the pillows were… free! Ok, I may have paid 50 cents for the zippers. But almost free! A good book, some lavender lemonade, and I’m in for a good afternoon…

Happy DIY-ing!